Guide · 5 min read
How to make an OTDR test report
An OTDR test report records, for each fibre, the trace, the events with their loss and reflectance, the total loss and the result against agreed limits, together with the cable, the route, the test settings and who tested it. To generate one from .sor files, open them in an OTDR report generator such as the OTDR Wizard viewer, set the pass/fail limits from the project specification, fill in the report fields and export a PDF: one fibre, a 1310/1550 nm pair, or every fibre of the cable in one document with a cover page and summary.
What the report should contain
A client or network owner reads an acceptance report to answer three questions: was every fibre tested, does each one pass, and can the result be traced back to the measurement. A complete report holds:
- Project details: project, client, route or link name, cable ID and the two locations (A and B).
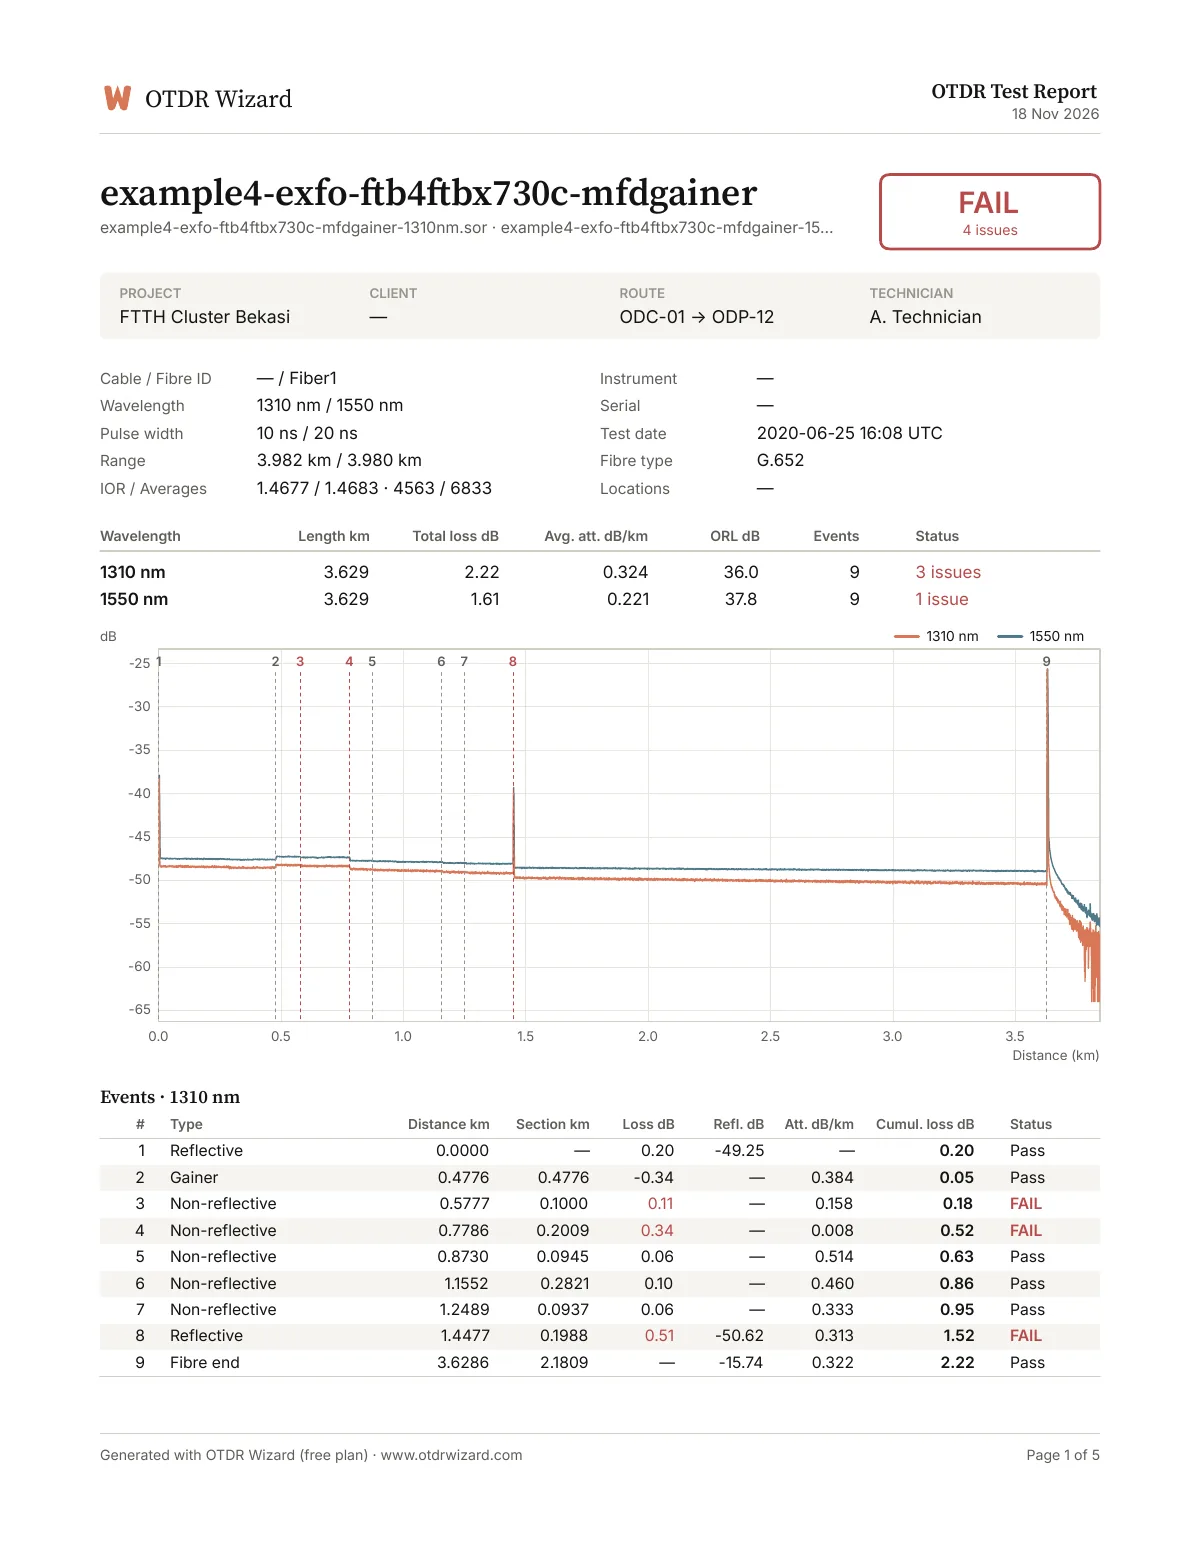
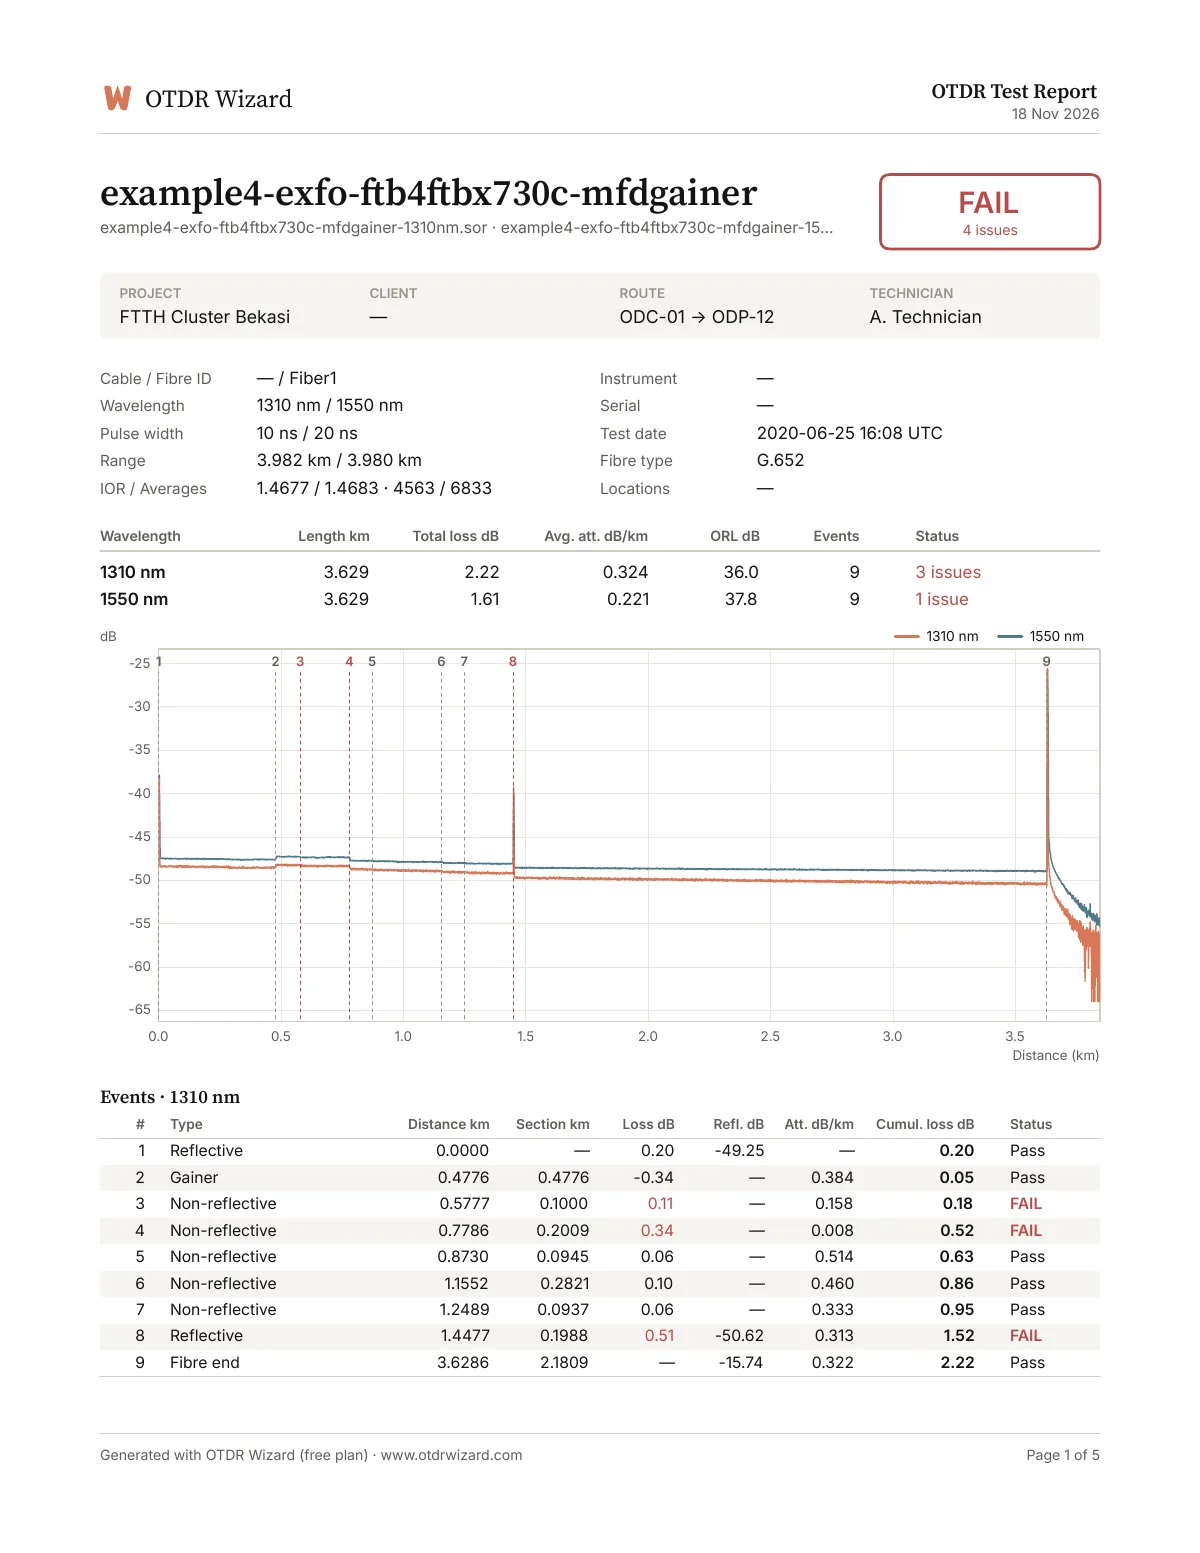
- Per fibre: fibre number, wavelength, the trace, the event table (distance, type, loss, reflectance, cumulative loss), total loss, optical return loss and length.
- The verdict: pass or fail, with the limits it was judged against, for splices, connectors, reflectance, attenuation and the total loss budget.
- Test settings: pulse width, range, averaging time and group index, so the test can be repeated the same way.
- The instrument: make, model and serial number, ideally with its calibration date.
- Who and when: the technician, the test date and a place to sign.
Where the specification asks for bidirectional results (testing from both ends and averaging, which removes gainers), report both directions and the average. Each .sor file holds one direction, so a bidirectional report needs the files from both ends.
Make the report in OTDR Wizard
- Open the files. Go to the viewer and drop in every
.sorfile for the cable. Name files so each fibre’s wavelengths group together, for exampleCORE01_1310.sorandCORE01_1550.sor; the viewer then pairs them. - Check the test information. The Parameters tab shows the cable and fibre IDs, locations, operator and instrument stored in each file. These come from the OTDR as it was set up on site.
- Set the limits. Select Pass/fail limits and enter the values from the project specification, including the maximum total loss as your link loss budget. The pass/fail limits guide explains each one and its usual value.
- Review the results. The Status tile and the All files tab show which fibres fail and why, before anything is exported.
- Export the PDF. Select Export, choose PDF and the scope:
- This file for a single trace;
- This fibre for a 1310/1550 nm pair on one report;
- All open files for the whole cable: a cover page with a summary table of every fibre, a signature block, then one page per fibre.
- Fill in the report fields: project, client, route and technician. Choose Letter or A4 paper, and whether to add the appendix with every parameter stored in the file.
Export
A report to share: status, results, the trace and the event table, with every parameter in an appendix.
Files
This fileThis fibre (1310 + 1550 nm)All open filesReport
Paper sizeLetterAdd an appendix with every parameterProjectTechnicianCancelExportThe report is made in your browser from the files on your device; they are not uploaded. Each exported file counts as one export: 5 a month are free on each device, and the Pro and Business plans cover larger projects and put your own logo at the top of every page.
What is on each page
- Page 1 per fibre is for decisions: the status, the key results (length, total loss, average attenuation, ORL), the trace and the event table, with failing values marked.
- The appendix lists every parameter the instrument stored, for the record and for anyone who needs to repeat the test.
- The cover page (several fibres) summarises the cable: one row per fibre with its length, loss and status, and the signature block.
Spreadsheets and records
Some clients want the numbers rather than a document. The same files export to an Excel workbook with a sheet per table, or to CSV; see exporting OTDR results to Excel. Many projects deliver both: the PDF for sign-off and the spreadsheet for the asset records.
Good practice
- Use one set of limits for the whole project, written in the report, so every fibre is judged the same way.
- Keep the original
.sorfiles with the report. The report is a summary; the files are the measurement, and they can be opened again in any SR-4731 viewer. - Correct only what was entered wrongly. If a cable ID or location was mistyped on the instrument, it can be fixed before reporting with the SOR editor (Pro and Business), which marks every change in the file. Measured values such as length and loss come from the test and must not be changed.
- Check a sample by eye. Open a few traces and read them, as described in how to read an OTDR trace, rather than relying on the status alone.